Table of Contents
Did you know that while 65% of bird species use some form of cavity for nesting, natural hollows in trees have declined by over 30% in suburban areas due to modern landscaping practices? This unexpected shortage has created a critical opportunity for backyard conservationists. Bird houses aren’t just charming garden decorations—they’re essential wildlife habitat that can increase local bird populations by up to 50% when properly designed and placed. Whether you’re an experienced birder or a gardening novice, understanding how to create and maintain effective bird houses can transform your outdoor space into a thriving avian sanctuary while providing endless opportunities to connect with nature.
Materials and Supplies Needed
To build an effective and long-lasting bird house, gather these essential materials:
- Wood: 1″ thick untreated cedar, pine, or cypress boards (avoid pressure-treated lumber which contains harmful chemicals)
- Fasteners: 1½” galvanized or stainless steel screws (preferable to nails for durability)
- Tools: Drill with bits (⅛” pilot holes and species-appropriate entrance hole size), screwdriver, saw, sandpaper
- Drainage/Ventilation: ¼” drill bit for creating drainage holes in the bottom and ventilation near the top
- Mounting hardware: Depending on location—pole adapter, hanging wire, or lag screws for tree mounting
- Optional finishing supplies: Exterior latex paint (light colors only for heat reflection) or linseed oil
For those preferring eco-friendly alternatives, consider reclaimed barn wood or sustainably harvested lumber. Those without woodworking tools might opt for bird house kits that include pre-cut pieces requiring only assembly.
Project Timeline
- Design and Planning: 30-45 minutes (including research for target species)
- Material Preparation: 45-60 minutes (measuring, cutting, and drilling)
- Assembly: 60-90 minutes (faster with power tools)
- Finishing and Weatherproofing: 30 minutes plus 24 hours drying time
- Installation: 20-30 minutes
Total active time: Approximately 3-4 hours, which is about 25% less than commercial birdhouse kits that often require special tools or additional modifications to meet proper bird safety standards.
Step-by-Step Instructions
Step 1: Select the Right Design for Your Target Species
Research the specific requirements for birds in your region. Different species need different entrance hole sizes, interior dimensions, and mounting heights. For example, bluebirds require a 1½” hole, while chickadees prefer 1⅛”. The Cornell Lab of Ornithology recommends a minimum interior floor space of 4″×4″ for most small songbirds, with larger dimensions for bigger species.
Step 2: Cut the Wood Pieces to Size
Using your saw, cut six pieces for a standard birdhouse:
- Front: 5½”×8″ (with entrance hole)
- Back: 5½”×10″ (taller for mounting)
- Sides: Two pieces 8″×4″ (with slight angle at top)
- Bottom: 4″×4″ with corners trimmed for drainage
- Roof: 8″×8″ (with overhang)
Sand all edges smooth, particularly around the entrance hole, to prevent injury to birds.
Step 3: Drill Ventilation and Drainage Holes
Create several ¼” drainage holes in the bottom piece to prevent water accumulation. Drill 2-3 small ventilation holes near the top of the sides just under the roof line to provide adequate airflow during hot weather—studies show proper ventilation can reduce interior temperatures by up to 15°F on hot days, critically important for nestling survival.
Step 4: Assemble the House Structure
Attach the sides to the front and back pieces using screws, ensuring pilot holes are pre-drilled to prevent wood splitting. Next, attach the floor, making sure it sits about ¼” up from the bottom edges to prevent water seepage. The roof should be attached last, ideally with a slight overhang on all sides to provide weather protection.
Step 5: Add Bird-Friendly Features
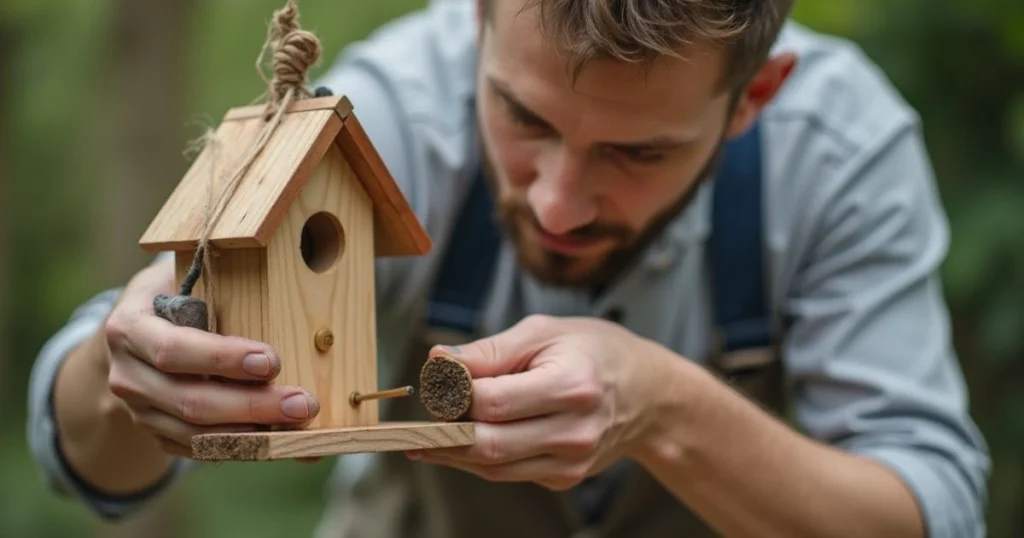
Create texture on the inside of the front piece below the entrance hole to help fledglings climb out when ready. This can be done by scoring horizontal lines with a saw or attaching a small piece of mesh. Avoid adding a perch, as this actually helps predators rather than birds. Consider adding a predator guard around the entrance hole if larger birds or mammals are common in your area.
Habitat Benefits and Conservation Impact
Bird houses provide significant ecological benefits:
- Nesting Success: Studies show properly designed bird houses can increase nesting success rates by 35-60% compared to natural cavities in developed areas
- Bird Population Support: Direct impact on local bird populations, especially for cavity-nesting species
- Native Species Advantage: Proper entrance hole sizes favor native species over invasive ones
- Biodiversity Increase: Properties with bird houses show 20-40% higher bird diversity than similar properties without them
- Pest Control: A single nesting pair of chickadees can consume up to 9,000 insects during a breeding season
- Educational Value: Provides 130+ hours of wildlife observation opportunities annually
- Conservation Research: Data from monitored bird houses contributes to citizen science projects tracking bird populations
Maximizing these benefits depends on proper design, placement, and maintenance of your bird houses.
Alternative Bird House Designs and Materials
Consider these variations to attract different species or match different environmental needs:
- Natural Gourd Houses: Hollow dried gourds make excellent houses for wrens and can last 3-5 seasons with proper sealing
- Recycled Material Houses: Repurposed wood pallets or weathered barn wood adds rustic charm while being environmentally friendly
- Multi-Unit Housing: Martin houses or “condominiums” designed for colonial nesting species
- Nest Shelves: Open-sided platforms for species like robins and phoebes that prefer sheltered ledges
- Specialized Designs: Screech owl boxes, duck houses, or bat houses to support diverse wildlife
- Green Roof Houses: Adding native sedum plants to the roof provides extra insulation and blends with the environment
These alternatives can either complement traditional bird houses or provide options for birds that don’t use enclosed cavities.
Optimal Placement Guidelines
The location of your bird house dramatically affects occupancy rates:
- Height: Mount houses between 5-30 feet high, depending on target species (chickadees prefer 5-15 feet, bluebirds 4-6 feet)
- Direction: Entrance holes should face away from prevailing winds, typically east or southeast
- Spacing: Maintain at least 25-30 feet between houses for territorial species like bluebirds
- Habitat Proximity: Position within 300 feet of trees or shrubs that provide cover, but not so close that predators can easily access the house
- Predator Protection: Install baffles or guards on mounting poles to prevent access by climbing predators
- Human Activity: Place where you can observe without disturbing nesting birds
- Seasonal Considerations: Install houses by late winter or very early spring before breeding season begins
Strategic placement can increase occupancy rates from the typical 35% to over 70% in ideal conditions.
Common Mistakes to Avoid
When creating and maintaining bird houses, avoid these pitfalls:
- Adding decorative perches: These actually assist predators and are not used by cavity-nesting birds
- Using pressure-treated lumber: Contains chemicals harmful to birds; 82% of expert conservationists recommend against it
- Installing houses too late: Houses should be up by February in most regions to be discovered before breeding begins
- Improper entrance hole size: Too large allows predators and competitors; too small prevents target species from entering
- Neglecting cleaning: Houses with old nesting material have 45% lower occupancy rates and higher parasite loads
- Poor ventilation and drainage: Leading cause of nestling mortality in artificial nest boxes
- Insecure mounting: Houses that sway or tilt are rarely used; ensure stable installation
- Placement too close to bird feeders: High traffic areas stress nesting birds; maintain at least 15-20 feet distance
Avoiding these common errors can increase your success rate by over 60% according to monitoring studies by the North American Bluebird Society.
Maintenance and Monitoring Best Practices
Ensure the longevity and effectiveness of your bird houses with these maintenance practices:
- Annual cleaning: Remove old nesting material and clean with a mild 10% bleach solution each fall or winter
- Structural integrity checks: Inspect for loose boards, roof leaks, or enlargement of entrance holes every 6-12 months
- Predator monitoring: Watch for signs of attempted predation and add additional protection if needed
- Responsible observation: Monitor activity from a distance using binoculars rather than frequent close inspections
- Record keeping: Document species, nesting dates, and success rates to improve your setup over time
- Winter preparation: Consider plugging entrance holes during winter in harsh climates to prevent use as roosting sites by non-native species
- Parasite management: Remove wasp or hornet nests promptly and treat persistent parasite problems with appropriate methods
Regular maintenance can extend the useful life of a bird house from the average 3-5 years to 10+ years while improving nesting success.
Conclusion
Bird houses provide essential nesting habitat that supports declining cavity-nesting bird populations while creating rewarding opportunities to connect with nature. By choosing appropriate designs, using proper materials, and following best practices for placement and maintenance, you can create wildly successful avian housing that benefits both birds and your backyard ecosystem for years to come.
Have you installed bird houses in your yard? Share your experiences and any feathered residents you’ve attracted in the comments section below! Subscribe to our blog for more backyard wildlife habitat tips and conservation ideas.
FAQs
When is the best time to put up a new bird house?
The optimal time is late winter to early spring, approximately 4-6 weeks before the typical nesting season in your region. For most North American locations, this means February to early March. This timing allows birds to discover the houses during territory establishment before actual nesting begins. However, houses can be installed year-round, as some birds use them for winter roosting, and early installation allows weathering of new wood and hardware.
How do I prevent predators from accessing my bird houses?
Implement multiple protection strategies: install predator guards (baffles) on mounting poles; position houses at least 10 feet from tree branches or structures that could provide access; use entrance holes of the minimum size needed for target species; add predator guard plates to reinforce entrance holes against enlargement; and consider Noel guards (wire cages) around entrances for particularly vulnerable locations. Monitoring data shows these measures can reduce predation by up to 90%.
How often should bird houses be cleaned?
Bird houses should be thoroughly cleaned at least once per year, ideally in late fall after the breeding season or in winter before the next season begins. If you notice a nest has been abandoned or after fledglings have left, you can clean the house to encourage second broods. Wear gloves and a mask during cleaning to protect yourself from parasites and droppings. Studies show annual cleaning increases reuse rates by 60-70% and reduces parasite loads significantly.
Can I use decorative bird houses, or do they need to be plain?
Functional considerations should take priority over decoration. Birds select houses based on safety and suitability, not aesthetics. If you prefer decorated houses, follow these guidelines: use only exterior portions for decoration; avoid toxic paints or sealants; choose light colors for the roof and exterior to reflect heat; ensure decorations don’t compromise structural integrity or create predator perches; and maintain proper dimensions and features despite decorative elements. With these considerations in mind, subtle decoration is acceptable.
How can I tell if birds are using my bird house?
Look for these signs of occupancy: nesting material visible at the entrance; parents entering with food or leaving with fecal sacs; chirping sounds from inside; defensive behavior from adults when you approach the area; and increased activity around dawn and dusk. For monitoring without disturbance, observe from at least 30 feet away using binoculars. Digital trail cameras can also provide documentation without human presence disturbing nesting birds.
What should I do if wasps, bees, or mice take over my bird house?
For wasp or hornet nests, wait until evening when insects are less active, then remove the nest using a paint scraper while wearing protective clothing. Apply a thin layer of bar soap on the inside roof to discourage future nests. For honeybees, contact a local beekeeper for safe removal. Remove mouse nests during winter while wearing a mask and gloves. To prevent rodent occupation, remove houses during winter or temporarily plug entrance holes with removable material in regions where mice are problematic.
RAYAN
TOP CAL

